When travelling, people often want to ‘give back’. So do I, but I’ don’t believe in making myself feel better by caring for orphans who will be traumatized when I leave again. I’m not cynical: I do believe that you have to try to leave a place better of when you leave than when you arrived. One of the easy ways to this involves maps.
When travelling overland, I am often puzzled to see people using maps for which you have to pay. Sometimes on a GPS device (why would one buy a dedicated GPS?), sometimes on paper (paper, mind you!).
This is weird, as paper maps don’t evolve while in your posession. Most propieratary GPS maps don’t either, or when they do, change is very slow. But the main question is: why pay for something, when there is something free available – something which is often better. We’re talking both free as in free beer and free as in freedom.
It is called Open Street Map (OSM), the Wikipedia of maps. As the data is free, anyone can use them in any way they like. So you don’t have to stick to the ‘ugly map’ on the www.openstreetmap.org website. The maps are made based on aerial photography (you can see where roads are from the air), GPS tracks (where people have been) and local knowledge (I know the name of this street). In an ideal world, you combine all three. In practice, often one or two pieces are missing – this makes for incomplete and sometimes inaccurate maps. Though often, still usable.
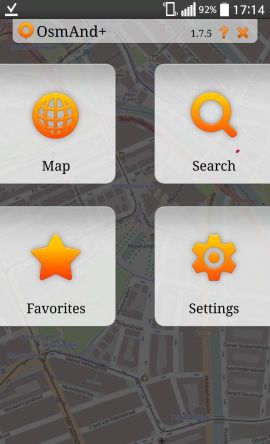
There is no device like a smartphone when you’re travelling (Tripadvisor, Scribd for Lonely PLanet, play music or even video’s, read books, take snapshots). Smartphones are supposed to be easy. And they are. In fact, they are a lot less scary than computers are: a lot of people who never learned to work with computers, learn to play with smartphones and tablets without effort. However, when it comes to OpenStreetMap on smartphone, there is some work involved. I’ll talk here on the use of Osmand, Openstreetmap for Android smartphones.
Oh, and before you go squeeking, you DO NOT NEED INTERNET on your smartphone to use Osmand! The only thing you’ll need is unobstructed sky. No internet, not even cell phone coverage.
Why would you use Osmand as your main navigating partner?
- Your smartphone is flexible, and so is Osmand. You can download maps for any country in the world. You can use it with or without voice navigation. You can use it in your car, on your bike, while hiking or during a city trip. So no buying dedicated devices, learning various softwares.
- The map isn’t just streets (and hiking trails you won’t find on ANY other map), it also contains supermarkets, musea, gas stations, campings, hotels,….
- Osmand allows you to easily track your trips. So you can make a pretty travel map, keep them as a souvenir or for statistical purposes (average speed, max speed, travel time, etc)
- Osmand comes with Open Street Map integration, so you can easily give back. So when travelling to a poor region, you help out the businesses you visit by making them more visible and findable. Meanwhile, you’re making a map which is often the best available even better. This in turn allows anyone to develop services based on the data. Or a simple use case: it allows emergency workers to get to people in need.
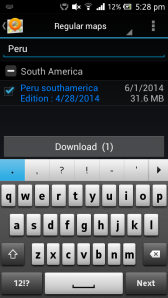
- And I would almost forget: you save on buying a GPS device and learning to use it. You don’t have to buy expensive maps for every country you visit. You get to download 10 maps for free (most of the time one country = one map). Of course you can choose to buy the software, allowing unlimited downloads. That way, you can refresh your map every week or every month with all the latest contributions made by half a million OSM contributors. Of course, you download the map when you have free WiFi available. For Peru, the download is just 30 megabyte. If you’re an extreme freebee, you can even get the full version for free. But I won’t explain how you do that 🙂
Installation and setting up the software
Osmand takes a while to get used to. The thing with an app that can do anything, is that you can do a lot of things. So you have to work it a bit before you’re on the road.
First, install the app. If you like the app, just buy the Osmand+ version with unlimited map downloads.
Then, download some maps. First make sure you’re connected to wifi. On the main screen, choose Settings>Data management and hit the download button in the top right corner. A list of available countries and areas is downloaded. You can search for countries or navigate continents to choose your download. Hold tight while downloading – if you try to do something else meanwhile, it often does not complete.
Now you’re ready to check out the map. You can and should tweak the map for how you want to use them. There are a lot of settings you can try, and you can vary them between the car, bike and walking maps. To access the map display options, go back to the main screen and choose “Map”. Use the options button on the bottom right of your device (often three horizontal llines) to access map settings. Choose “Configure screen” to set the details of what you want to show in which map view.


The easiest way to use Osmand for navigating, is picking your destination from the map. Just zoom to where you want to go, pinch the map long and a little square will appear. Hit the square, and choose “Set as destination”.


If you don’t know where your destination is, you’re screwed. OpenStreetMap hasn’t got very many adresses, and Osmand isn’t very good at finding them. There are some ways around of course. On the main screen, choose search. First screen is for finding POI’s (points of interest). This includes things like hotels, restaurants, but also names of towns or national parks. Depending on where you’re going, very few or almost all possible places are listed here. The second screen is for finding addresses. You have to choose a street within a town within a downloaded map.
This is probably the weakest point in OpenStreetMap. I sometimes find myself looking at other maps to find the place I want to go, then finding this point in Osmand. Google Maps will almost always give you a result, but it isn’t always correct. If a POI is in OSM, you can more or less count on it being correct.
Once you’ve picked your mode of transport and your destination, you can get going. But first you need a GPS fix. This might take up to several minutes, depending on the weather, overhanging trees, being in a steep valley or a city with high buildings, being under a roof, you’re movement and your device. With my old Sony Xperia I learned the hard way that I had to put my phone ready for navigation, than leave it outside for a few minutes – any movement and the fix would not come. My current LG G2 on the other hand almost always gets a fix within seconds, even inside moving trains and busses. When buying a smartphone, it is very hard to find out GPS quality beforehand. From what I’ve read, there are only two rules of thumb. As there is a lot of mathematics involved in getting a fix, the faster the processor the better. Some devices use the Russian Glonass as well as the American GPS system, which makes it easier to find enough satellites.
When you’re navigating, the map will follow your position. When you hit the map, you can still view other places. Hit the “I” at the bottom left for map viewing, the blue triangle to return to navigation. With the compass button on the top left, you can choose the map orientation. I always keep the north on top, but most people prefer the map oriented in driving direction. I don’t like how that makes the map move on roundabouts or at traffic lights, but I’m a map nerd so you might feel otherwise. At the moment there is no 3D map view available, but that might be in the works. If you want to change the proposed route (never blindly trust a routing engine), just pinch long, hit the square and choose “Add as waypoint”.
Now for some extra mapping fun
Once you’ve mastered the basics, you should activate some plugins.


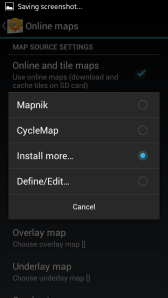
A fun extra are the “Online maps”. On the main screen, choose Settings>Plugins>Online maps to activate them. It sounds a bit strange to use online maps in an app for offline navigation. However, if you watch the map or the area you need when you have wifi, you’ll be able to view the background map later when offline. To activate the layers you want, go to Settings>Online maps>and choose Overlay map. My favorites are “Microsft Earth” for aerial photography, and “Relief” to get a hillshade map adding a lot of depth to your maps. It might take a while for the background to show up.

If you like to know where you’ve been (and get the material to make pretty travel maps like this one, you should activate “Logging services & Sleep Mode”. When you’re navigating, now you’ll be able to hit a black button with GPX to activate tracking. A GPX file is nothing more than a universal file format to store a series of locations you’ve been. Whenever the button is red, you’re route is being saved. When you’re navigating in a car, that’s enough. However, when you’re walking or biking, you can even switch off the screen and keep navigating and tracking. To do this, you have to “Enable sleep mode”, hidden behind a button next to the compass, top left of the map. You can also plug in a headphone and listen to the instructions instead of watching the map.
You can also show GPX tracks on the map. Hit the options button and tap Map layers. There you can choose “GPX tracks” and “Show your current track”. This is fun to keep track of your current excursion. You can also show older tracks, or you can even use external GPX files for navigating. To do this, you have to download them somewhere, then use a file manager to move the GPX track to the Osmand/Tracks directory. Anytime you have a track visualized on the screen, Osmand will ask you whether you want to use this for routing whenever you start a trip.
Now you have GPX tracks, you should share them with the world! You could download them to your PC to use them with the software or websites you like. But a GPX track contains a lot of useful information: speed and direction, existence of roads or trails. Even if you’re not going to edit OpenStreetMap yourself, this info can help other mappers a lot. Also, using Osmand it’s very easy to move your tracks to the cloud, so you don’t have to manage the files yourself. To do this, activate the “OSM editing” plugin. Now you still have to add your OSM user name and pasword in order to be able to update. Making an account LINK is a matter of seconds, but easiest if you do it on a computer.
Now, go to Settings>Data Management>GPX data. A tap will show you some statistics for your track. A long tap should give you an option screen where you can pick “Send to OSM”. It’s not necessary to add any further details, you can just hit Send. Anyone will now be able to use your track to improve the map.
Points of interest
While you’re navigating, you might want to see tourist attractions, or hotels, or the nearest gas stations. This can be done when viewing the map. Tap Options>Map layers>POI> whatever you like. These points are generally just dots on the map. Sometimes you can get more info if you tap them.
If you think you found a place that should be on the map and isn’t, then you can easily add it using Osmand. Again, long pinch the map on the exact location of the thing you want to add, than hit the square and click “Create POI”. Now give a name where applicable, and pick the type of thing you’re adding. Don’t just write anything, or it will not be useful to anyone. Hit “Other” to get a list of types of things you can add, or hit the text field twice to get a long list of specific things. After a while, you’ll know that you just type “fuel” for a gas station, so you can add them easily even while driving. You should check the Openstreetmap Wiki for more information on how to define certain POIs. These POIs are stored locally (you can’t really visualize them). When everything is OK, you still have to confirm. Often, you’re keypad will be blocking view of the button (I know, design). Hit the back button once (!) to hide the keyboard.
Don’t wait to long to upload your new POIs to OpenStreetMap, otherwise you might duplicate someone elses work! Go to Settings>OSM editing>Locally saved OSM POIs/Bugs and tap the upload button to add them to the map. Within a couple of minutes it will show up on OSM.org, and within a few weeks or months it should be included in the downloadable files for Osmand.

Only upload things you know really exist from your own experience (i.e. don’t go adding hotels from a Lonely Planet map, as this is breach of copyright!). Only map things if you know the exact location! After adding some gas stations on long roads in India, I checked my work using an online editor, and I saw that my pinches were off by up to a couple of 100 meters. Only map things if you’re sure they are not on the map yet! They might not show up on your downloaded map because someone else mapped them recently. Or maybe you overlooked them.
When you’re not sure about if or how to map something, just make an “OSM bug”. You can also do this when you find an error on the map. You do this in almost the exactly the same way as adding a POI. Just long tap a point, hit the square and pick “Open OSM bug”. Give a detailed description. “One way street” is not detailed. “One way street, heading north” is better. “One way street, heading north, until junction with road X” is perfect. These changes are uploaded in the same way as the POI’s. This information is available for everyone using the “Notes” layer on OSM.org (click here for an example). You can use them for your own future reference, or just leave them for more experienced mappers to solve.
If you’ve gotten this far, chances are you’re a mapping nerd as well. Dig in: go to osm.org and hit the Edit button and start messing around. Or if you don’t like learning by breaking things, go to learnosm.org to get step by step help. Or if you’re the social kind, join the mailing list for your area and ask when the next meetup is. Be prepared for a lot of emails with completely neurotic mapping talk!
(You can comment here or if you have an OSM account, at my diary post about this article)
Osmand is constantly evolving. The how to articles on the well hidden Osmand wiki should stay up to date, this article already isn’t anymore (in some details).

Hi, Very nice article.
You mention: “If you don’t know where your destination is, you’re screwed. OpenStreetMap hasn’t got very many adresses, and Osmand isn’t very good at finding them. There are some ways around of course. ”
There is another one you haven’t mentioned.
You can also search online (if you have wifi or a data connection). If you have a streetname that isn’t mentioned in OsmAnd, you can try to find it online.
In the search address screen, you see at the bottom right a “>” arrow. That allows you to search online using nominatim. It has a better search algorithm then OsmAnd and can find much more, including POIs.
The same “>” can be found on the online search screen and leads you back to the offline “internal” search.
Thanks for writing up this guide! I’ve included a link to it on my list of open source alternatives 🙂
http://howdystranger.wordpress.com/open-source-alternatives/
Also, it would be nice if your blog had an about page, so we can know a bit more about you! (Maybe there is one but I’ve missed it?)
It already had an about-page, just completely hidden away. Just now found out how to make it show up. The link is on the top right of all pages now. Thanks for getting me motivated to do that 🙂
And thanks for the link!
Interesting how many features this app offers – nothing compared to Skobbler or Navigator, the two I’m using in South America. I guess I should start to report back to OSM as well, since I keep encountering bugs (eg. Skobbler always want to turn left at cloverleaf style intersections, never use the entrance to the right… Annoying, because if you’ve picked the wrong lane before the cloverleaf comes into view on the screen you suddenly have to change lanes, not easy in dense traffic with a truck).
What I find particularly weird is, that both my apps are using OSM, but come to different results or routing, or Navigator too often telling me “route not found”, which Skobbler can find – so I guess the routing function differs a lot between apps! If you could send me link to the “secret free version” I would appreciate 😉 http://dare2go.com
Could you point me to one of those cloverleafs where things go wrong? I’d like to check out wether the data is wrong or the routing.
As for the free complete version: Google is your friend 🙂 But honestly, you could use the free version for a year before you really start to need the full version. By then you should love it enough to support the team a bit. Or hate it so much that you don’t want the full version.
[Sorry that I didn’t keep up with my comment until today – better late than never!]
It happened to me twice now in Mendoza, first time leaving the city going south onto the Ruta 7 towards the border with Chile, second time coming from the Ruta 7, already well inside the city limits I had to get off the highway and was told to turn LEFT (there was no left turn of course, but a right 270 degree cloverleaf turn).
Scariest thing happened 2 days ago here in Santiago (after the latest update of Skobbler): it sent me off Costanera Norte into the exit of the parking station of “Alto Las Condes” = a large shopping centre. You come off the highway in a sharp 180 degree bend, with plenty of cars behind you, and suddenly a boom gate in front with lanes into the parking garage. Now I’m driving a truck, 3.5 meters tall, the parking garages were all built to 2.2 meters clearance, backing out didn’t work for the traffic jam I had created behind me!! All I wanted was a route to Los Dominicos… Why the bloody thing took me through a PRIVATE PROPERTY is the first mystery (at night this would be locked!), why through PAY BOOTHS the second, why then next to a U turn the third. I had to bribe security guards to get me through locked gates towards a loading dock and out – nerve wrecking!
Now imagine driving around in Santiago with a 3.5 meter tall vehicle you just bought. I actually made a U-turn in a similar (though not as frightening) situation in Santiago 🙂 . It’s a bit frustrating how supermarkets and shopping centra discriminate against tall cars – then again, in Ecuador or Peru there’s a lot of supermarkets with no parking space whatsoever.
So I looked into both cases a bit. Can’t be sure, but I think the app is to blame.
The turnof in Mendoza is beautifully mapped, though it was reworked thoroughly in july 2014. So if your map data is older than that, it might have been wrong before. OSM is young but coming of age very quickly, so it is important to update your data often. With Osmand you can do this monthly in South America, with other apps it’s often yearly. That is not enough.
In Santiago, a decent routing engine will do this http://www.osrm.at/9Hg or this http://www.osrm.at/9Hh . The map knows what you tried to use are ‘service roads’. A good router will prioritize the use of major roads, even if a service road gives a shortcut. The map data could be improved though, for example by adding the paygates. Of course, a router can ignore paygates too.
LOL – the second version is exactly what Skobbler did to me (including the U-turn once you come out of the parking lot) – you end up in Alto Las Condes. What you really have to do is turn onto the side road, running parallel to Costanera Norte, about 500-1000 meters BEFORE you hit the turn. For some reason Skobbler got that right the first time I drove there…
So, that example didn’t turn out quite right 🙂
I’m sure when I made it, it did something properly. In fact, I was talking to one of the top Chilean mappers yesterday, and he will fix this – and wanted to formally apologize 🙂
Cheers!
Joost, since you seem to have so excellent connections to OSM Chile people, I came this week across one of the above mentioned “left turns” on a cloverleaf intersection in Chile: coming from San Esteban (north-east of Los Andes), turning onto the 60 (Libertadores) going towards Mendoza. There’s a perfect cloverleaf.
The second one, which I mentioned before, in Mendoza/AR, happened again: turning from Ruta 40, coming from the south, onto Avenida Gdor. Ricardo Videla. I met some Germans with Skobbler on a large iPad, where it shows a tiny break in the right turning lane; on my Nexus 7 the screen resolution is to small to show this.
I can’t see anything wrong with the data in either of these places. If your map is up to date, I’d suggest sending a bug report to the Skobbler people.
LOL – Skobbler support 😛
I sent them a loooong email with a number of points (took me 4+ hours to write the bloody thing) on the 20th of October – – – and still no reply or even acknowledgement that it was received. So I better forget that!
Thanks a lot. We used OsmAnd+ quite a lot, but learned a few new tricks through your blog. Very helpful.
Joost:
I paid AU$7 for OsmAnd+ 1.9.5 (fool! fool!), figured out how to search for a location, but cannot make it an origin or destination. OsmAnd always wants to make my current position the origin, annoying when you are sitting on a train planning the route you cycle when the train arrives.
So could some kind person explain how, after I have used to find a location, how to designate that as either an origin or destination.
Regards, Hedley (Lost in hell) Finger
Is my post that convincing that turns didn’t try the free version first? In that case: sorry!
I tried to replicate your problem, but I couldn’t. From what I understand, what you need to do is this (correct me if I understand incorrectly):
– set a destination
– cancel navigation
– mark a place on the map, click on the marker and choose “directions from”
– as long as you don’t hit the blue triangle bottom right, your virtual route will stay active. Only when you het the triangle, will your current location be used as the starting point
I can add some pictures to clarify, but bot right now, I’m on overpriced 3G.
Dear Joost:
I can search for and find a location on OsmAnd+ 1.9.5, but can’t turn it into a destination. I don’t like dropping markers on my smartphone because it involves too much scrolling, and zooming in and out.
So could someone please tell me how to use search to place origin and destination, from the main screen, step by step, menu by menu, button by button, to the final, autocalculated route. Then my life will be complete.
For an app that purports to be a competitor for Google Maps, its main functionality seems to be buried beneath a lot of fiddling.
Regards,
Hedley
So assuming you use the POI search: tap the result and choose “directions to”. If you were looking for an address: under the results are some buttons to set as destination or get directions.
Now if you want to use the result to navigate from, I think the only way is to use the same buttons to “Show on map”. Then the map zooms to your start place, you tap the marker and select “Directions from”. Again, you might have to cancel routing first.
I never said Osmand was an easy app. I don’t see it as a competitor for Google Maps that much, leave that to the like of other Openstreetmap based apps like Maps with Me or Skout. The strength of Osmand is the flexibility and the ease of contributing to a better map, while still using it for navigation needs (as opposed to dedicated mapping apps like Vespucci).
That said, version 2.0 of Osmand is supposed to be getting a much more user friendly user interface. I’m sure your 7 dollars will contribute to an even better app 🙂
If you have other problems or suggestions, you could post them to the Osmand help forum: https://groups.google.com/forum/m/#!topic/osmand/
Soon will yield 2.0 for Android, with partly of redesigned interface toward ease of use by new users.
Just recently released version OsmAnd for iOS https: //itunes.apple…app/id934850257, though still without navigation but with offline maps, offline navigation in development.
I would love to try 2.0 asap, but I understand it’s impossible to have the nightly build and the playstore version running on the same machine at the same time…
FYI: For address search in Vlaanderen (and only there), https://github.com/hvdwolf/OsmAnd-myAdditions/tree/master/address_maps/Belgium_Flanders allows you to search offline addresses using the (pretty complete) data from AGIV/CRAB.
Pingback: OSM – Riassunto settimanale #100 – Web Presence dell'Ing. Giuseppe D'Anna